by Kris Cone | Jul 20, 2013 | Listing Tools, Tour Updates
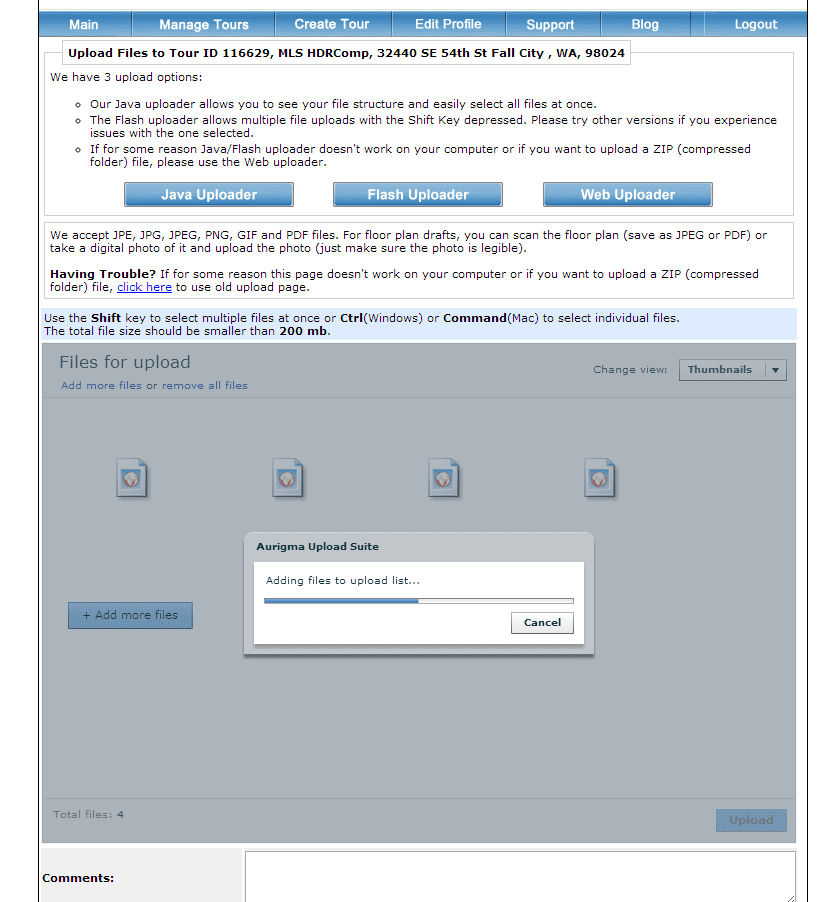
We recently made an update to our photo uploader tool to add a new Flash upload option. The default uploader is a Java-based program that requires Java to run and work on your computer. While 98% of computers have Java installed, there are some recent issues due to security concerns, and users of Apple computers are periodically experiencing issues where they can’t upload with this version, because Apple blocks Java from running on the Mac, at times. In addition if you are a Mac user and use Chrome as your browser of choice, the Java based uploader does not work because Chrome is a 32 bit application, and Java is a 64 bit application for the Mac.
So…we added a new Flash uploader that uses Adobe’s Flash tools to upload photos. It works pretty good, you just do not see your file structure initially. You need to click the button to +Add More Files, navigate to where you have the photos stored on your computer, and then you can use the SHIFT key (start at the first photo and then hold the key down, and click on the last photo to select all photos in that folder) or the CTRL key (hold the CTRL key and then just click photos you want to upload to highlight them) to select various photos. You will then see them added into the upload window. Then just upload.
You can also use the Web Uploader where you select one photo at a time, if all else fails. This option does support the uploading of zip files too, so you can compress your images and upload.

by Kris Cone | Mar 6, 2013 | Listing Tools, Tour Updates
I am really excited to announce some cool updates to the Single Property Website Tour. Click here to see a sample tour.
Updates include:
- Centering of the tour on any web page (it used to be left justified)
- Better fitting of the content to eliminate scrolling of the main content area
- Cool wrap around styling of the content section headers
- Ability to change the overall background color…so now you have two colors to showcase your brand and enhance the look of the tour. It makes the content really pop!
- Ability to upload a background image – this could be the image of the property, a view of the area, or a custom branding image featuring your logo. For now, the custom background image only shows on the branded tour.
You can make these changes on a tour by tour basis, or in your profile to have them apply to all future tours.
A little tip. If you use Google’s Chrome browser, you can install a free “color picker” tool that allows you to get the color code for any color on any web page. Click here for a list of programs you can install for free to get the color code. Once you have the code, go to Edit Details on the Manage Tours page for a tour, or Edit Profile, and put the color either in the background 1 or background 2 spot. You can also do this for text. For example, this green is the color code #878f55
It is really simple to do and is another way you can really showcase your brand. The next training session will go over some advanced tour customization tricks. Click here to register…it is FREE!
 We would love to hear feedback….please comment or post something in our support forum.
by Kris Cone | Feb 18, 2013 | Listing Tools, Tour Updates, What's New

Thanks to one of our providers in the LA area, you can see a great example of the Video Clips & Voic eover capability. Just click here to view the tour video and see how well an intro & exit video, video clips and a voice over works to really help sell this property.

by Kris Cone | Dec 19, 2012 | Listing Tools, Tour Updates, What's New
Exciting News! One new cool feature of the new floor plan drawing tool with real-time editing is the ability to generate photo-realistic images of floor plans, right within your account. Just edit the plan how you want by adding in more details and features, like beds, couches, rugs and more, save your changes, and then select the 3D Render option under the Share icon. Enter in your email, pick a size of the image and the plan orientation, and add a top color to the walls, if you want. You will get some images like this view below. Pretty cool!
[fpotour emt=”popover” bgc=”A19387″ ftc=”ffffff” bnm=”PB” tbs=”11111111″ swi=”3″ oid=”11406″ mtp=”0.80″ uid=”Y4XQRL14″ wid=”700″ hid=”530″]
PS. we also added a link called Corrections & Notes, which takes you to the old plan editing tool…if you are more comfortable with that. But we highly encourage the new Edit FloorPlans tool because you can change text, add a missing door or window, save, and update your tour, flyer and more within minutes! No more waiting!

by Kris Cone | Jul 19, 2012 | Listing Tools, Tour Updates, What's New
We just released an enhancement to our cool new embeddable tour widget – a WordPress Plugin! The plugin makes it easier to add your tour content to your WordPress powered website. There are no configuration options for the plugin on your WordPress site. Just follow the instructions below to add the plugin to your site, and then all configuration options for the tour content are done within your FloorPlanOnline Account.
If you do not have a website powered by WordPress, you can ignore this whole post!
Plan as a Button
We also added a new option to show the actual floorplan image of the listing as the button for the pop-up tour, so you can put some “eye candy” on your site. Try it here by clicking the image.
[fpotour emt=”popover” bgc=”ffffff” ftc=”0c004b” bnm=”PB” tbs=”01111111″ swi=”3″ oid=”62568″ mtp=”0.80″ uid=”N28N588C” wid=”700″ hid=”530″]
This enhancement is a great way to showcase your listing content, keep users on YOUR site, and give buyers what they really want to see – FloorPlans!
[pb_videoshowcase group=”7″]
Help Video
You can view the help video on how to use the embeddable content widget by clicking this image (or go to Help Videos under Support).
There are a few steps to get started
1. You need to first download the WordPress plugin. You can download it here (or there is a link on the Embedded Content page in your FPO account).
2. Go to your WordPress admin login, select Plugins and Add New. Find the plugin you just downloaded (probably will go to your Downloads folder on your computer), and then upload it to your website, then Activate it.
3. Login to your FloorPlanOnline account, go to Manage Tours, and then click the Photos & Marketing tools link to get to the Marketing Center. Then click the Embeddable Tour Content button.
4. Once there, check the box to Use on a WordPress website, configure how you want the content to show, and then just copy and paste the short code into your page or post where you would like the button or the tour content to show. IMPORTANT – Select the HTML tab right above the post or page content BEFORE you paste the short code….if you do not, then WordPress may add additional information to the code that will not make it work properly. Also, some plugins may conflict with our plugin. Right now, we are aware that the Shortcodes Ultimate plugin causes our plugin for the embeddable tour to not work. We are looking to fix this, but just disable plugins and refresh your page if you have this problem, and notify us of the plugin causing the problem and we will review for a potential fix.
5. When ready, hit Publish. The short code should display the content in your site. More instructions about how to edit the content options are on the Embeddable Content page.

by Kris Cone | Jun 13, 2012 | Listing Tools, Tour Updates, What's New
I am really excited to introduce the newest creation from the FloorPlanOnline Dev Shop – Embeddable Tours! We have had ways to embed the video or the floor plan widget into a website page for years now, but with this new enhancement, you can embed all or just a part of the tour into your website! You can pick what content tabs to show – show just the floorplan (which removes the tabs), the floorplan and roomplanner, or all content. A video on how to set it up is here – just click the image to the right.
[pb_videoshowcase group=”7″]
You have two display options:
1. Embed it using a button (select one of ours or upload your own button style) that pops the tour over your website….so the user never leaves the site…they just click, the tour opens over the page, they view, they like, they call you with an offer. This is great for websites that might have a pretty narrow content area or you can’t mess with the overall layout, or the in-line embedded view just would be too small. You could also put this in a widget area on your website.
Try it here by clicking this button (or you can upload your own button).
[fpotour emt=”popover” bgc=”ffffff” ftc=”0c004b” bnm=”1″ tbs=”01111111″ swi=”3″ oid=”62568″ mtp=”0.80″ uid=”782BS06C” wid=”900″ hid=”680″]
Or you can select the Plan Based Button that shows the first floor plan image as the button.
[fpotour emt=”popover” bgc=”ffffff” ftc=”0c004b” bnm=”PB” tbs=”01111111″ swi=”3″ oid=”62568″ mtp=”0.80″ uid=”N28N588C” wid=”900″ hid=”680″]
2.Embed it in-line with your content, just like this example below. We provide different sizes, but you can manually adjust the size to fit any pixel dimension you want. Just change the width and height dimension in the simple code you copy and paste. The content will adjust automatically and display it in an optimized format for the selected size!
[fpotour emt=”embeded” bgc=”ffffff” ftc=”0c004b” bnm=”1″ tbs=”01111111″ swi=”3″ oid=”62568″ mtp=”0.80″ uid=”782BS06C” wid=”990″ hid=”710″]
Each option allows the complete showing of all the tour content, on your site. It even works on the iPad! No more annoying pop-ups, page resizes, or LEAVING YOUR SITE! The user stays where they should, sees the content and leaves a happy camper. Plus, with either option, you get a full screen option to see the photos, video, or floor plan. You can even use our lead capture page to get the lead (we are working on some ideas here… :))
To get started, go to Manage Tours/select the Photos & Marketing Tools link for your listing, and then select the Embeddable Tour Content button. Configure it to how you want it displayed, including selecting what content to show first, and then just copy and paste it into your website (like a WordPress site), a blog, or many corporate websites. Your site and the users site does need to allow for javascript in order for the button to work…but most users allow for this.
The example above was done using the embedded tour option. Note, you can configure both the embedded tour and the button and use the code. Both work independently of the other. This is an example of just embedding the roomplanner tool.
[fpotour emt=”embeded” bgc=”ffffff” ftc=”0c004b” bnm=”PB” tbs=”00001000″ swi=”4″ oid=”62568″ mtp=”0.80″ uid=”VJP2T1G2″ wid=”990″ hid=”710″]
We would love more feedback on this feature. This is our first iteration, so I am sure there are some things to adjust or improve upon. Please comment below or send us an email to sales@floorplanonline.com and we can review your comments and ideas!


You must be logged in to post a comment.